Sunday, January 29, 2012

Beauty Resolutions and Acne Solutions!

So I know January is almost over but still think that posting my beauty resolutions is a good idea. Posting things on the internet usually makes me follow through on them ha. So here they are:

1. I must take better care of my hair! In the past I have bleached it and colored it pink, which I liked at the time but it ruined my hair and took forever to grow out. I finally got the bleached parts cut. No more of that. I still love the idea of pink or turquoise hair but there are less damaging options like the Colorbug. I would love to try it in the summer. I am going to put heat on it less, and use a heat protectant when I do. My hair is short but long enough to put into a ponytail, which makes it much easier to not style everyday. Rhiana wants me to stop washing it everyday but I don't know if I can do it. Maybe I will try. Maybe. Probably not.

2. I want to do my eye makeup more often. I get up so early and don't like to put on much makeup in the morning, but I really do like the way I look when it is done. And as Rhiana said, experiment a little more. I always say I want to try new things but I usually go back to brown and gold or just mascara.

3. This one is not exactly a resolution but kind of a goal. I want to find a red and an orange nail polish that look good on me. I search for a while... and then give up and purchase yet another blue or pink nail polish that looks similar to about three others I already own. This must stop.

4. Paint my nails more often. I have like 60 polishes but I don't use them. Why?! I have no idea. Not much else needs to be said here.

5. Stop dressing like I don't care. I haven't resorted to sweat pants yet (and I never will. NEVERRR.) But I get up late and throw on whatever. Jeans and slippers every day. With a ponytail. It's a good look. I would love to curl my hair for school more. It's a little cold for dresses but when the time comes, I have a few that I would like to wear.

I think that is a good start. And now... Onto something I have been kind of excited to post on here. My skin through the years and how I fixed it. I have had acne since I was like 12. It has gotten worse over the years and was the worst from July to about November of 2011. I have used so many different products to try to get rid of it.

December 2010:
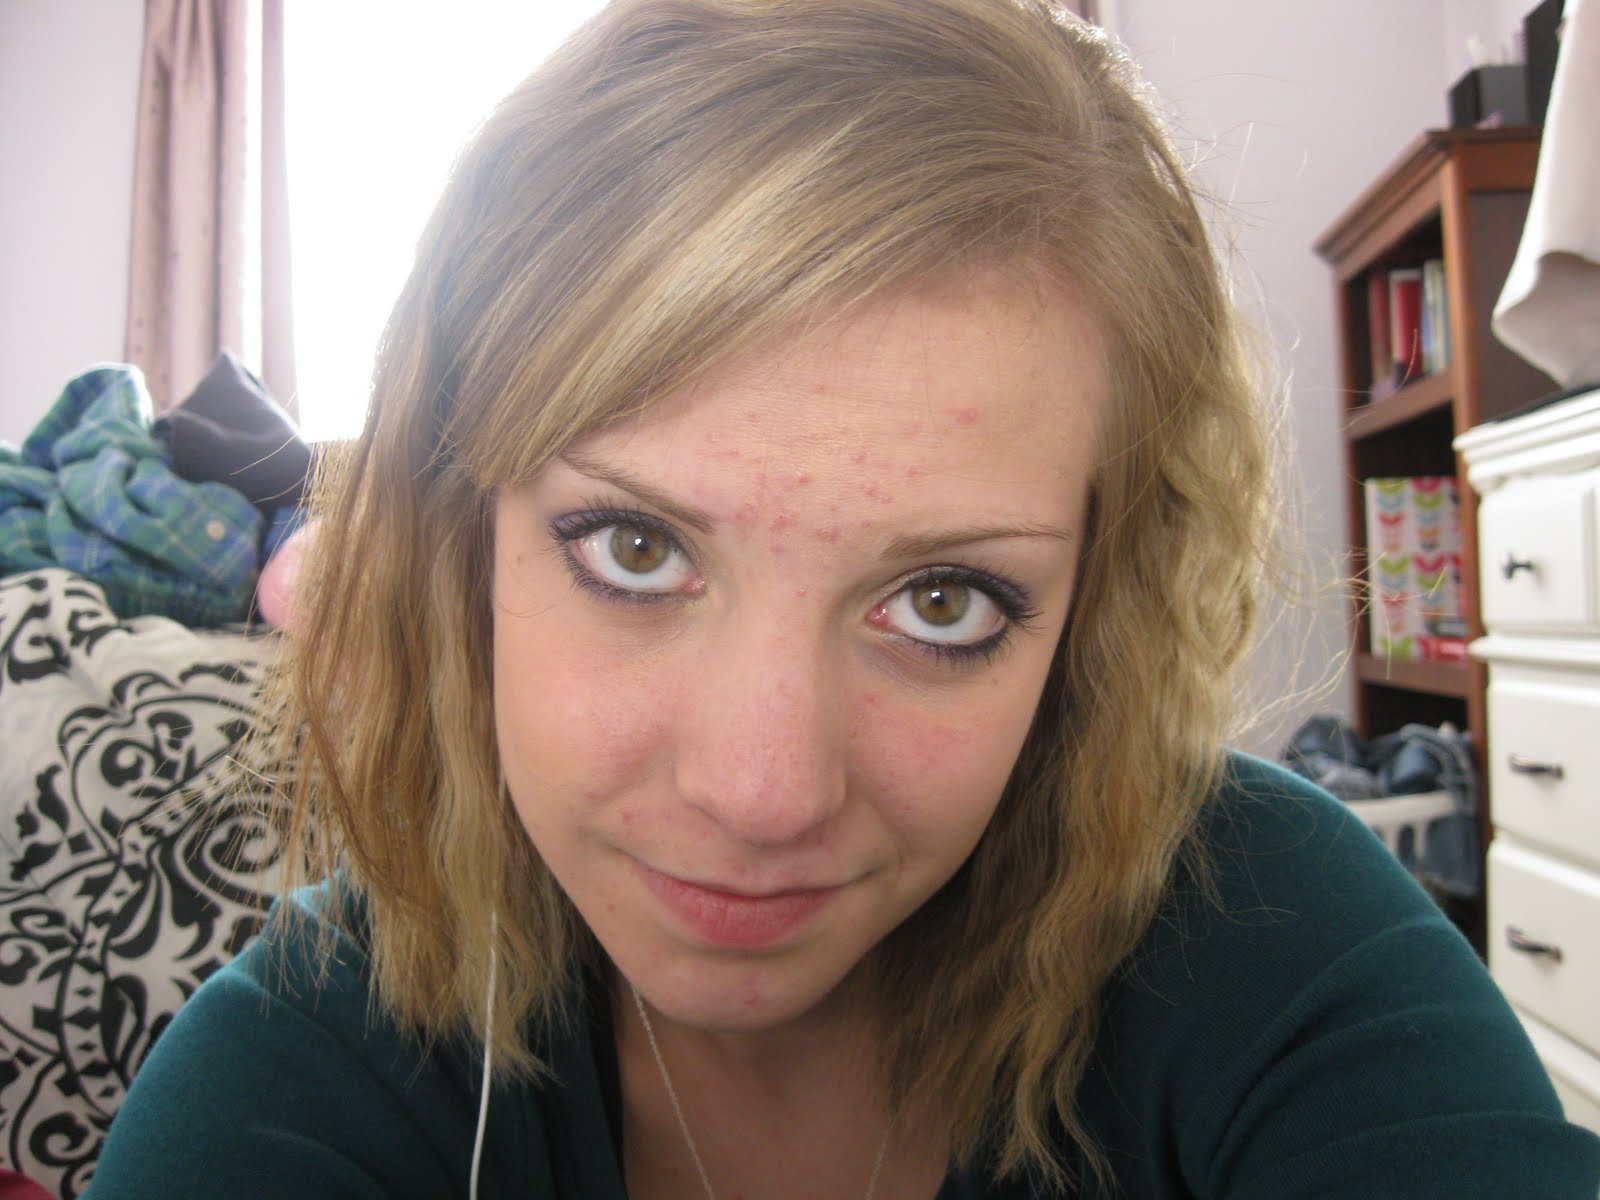

Dec 2010:


Jul 2011 A few weeks before I started using Clinique Acne Treatment:
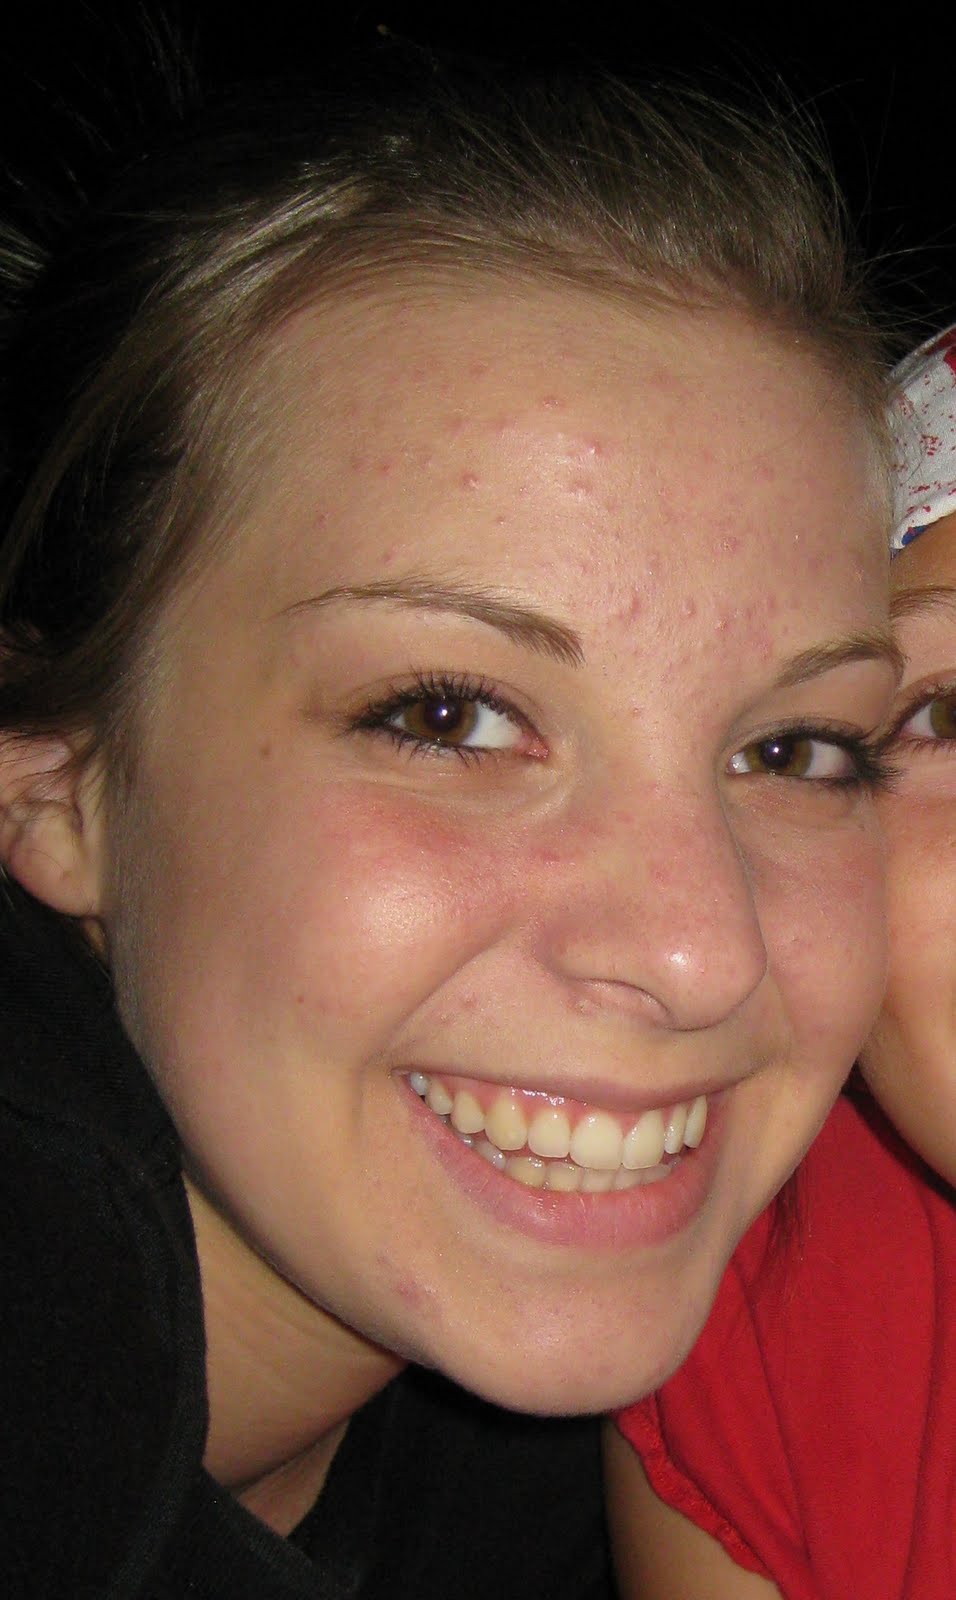

Jul 2011 The day I started Clinique:


August 2011 After I had been using Clinique for about a month:


It really hurt my skin and it was so expensive, so I started seeing a dermatologist. She prescribed me oral antibiotics and topical creams that cleared up my acne within a month. I also switched my foundation, face wash and moisturizer.

December 2011:


Jan 2012


Jan 2012
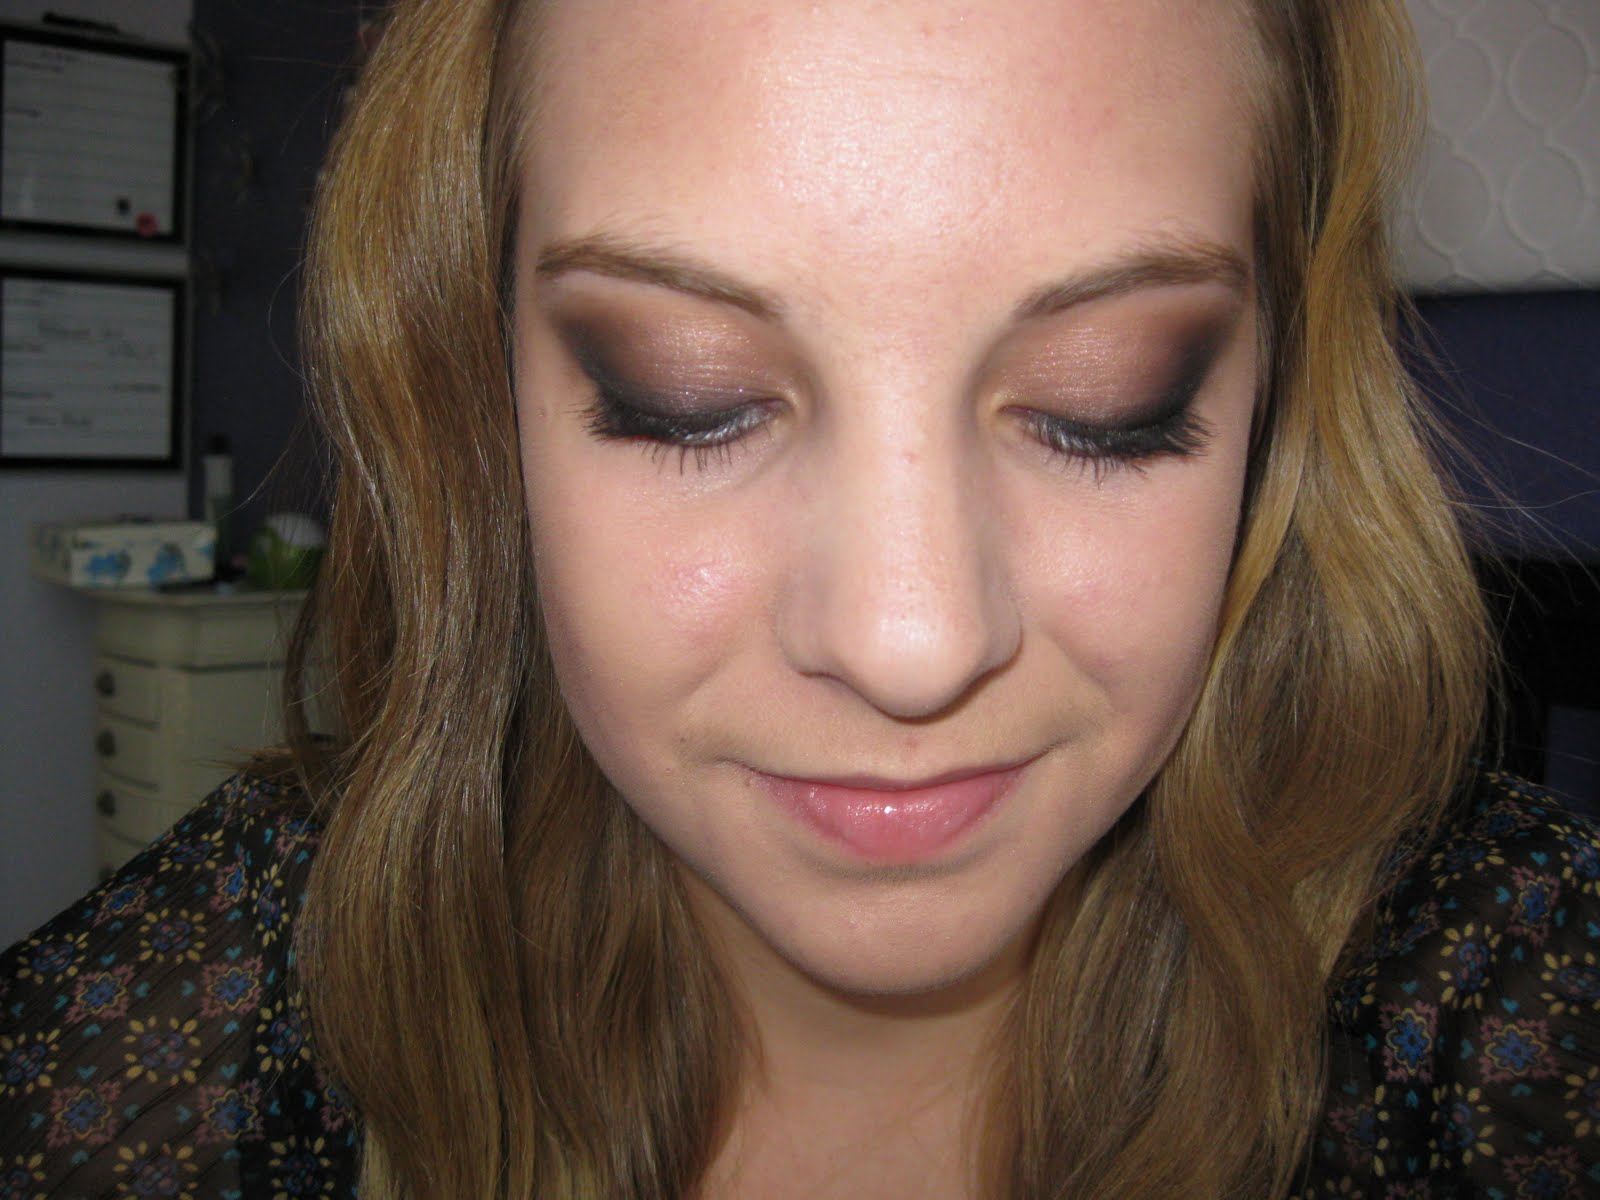

Jan 2012


I went from trying all this....


To (alongside my antibiotics) finding success with this...


Now that my acne has cleared up, I am much happier and a lot more confident. My attitude greatly improved, and now I don't have to spend so much money! I am thrilled. :)

Hope everyone has a great week :)

Naomi

Friday, January 6, 2012

Beauty Resolutions 2011

I'm a little late in posting this, but I'm not big on "new year" changes anyway- I'm of the group that believes that changes can be made any time, regardless of the date. Anyway though, I have some bad habits I'd like to break that involve beauty.--

1) I've got to stop chipping my nail polish off. This is my first one for a reason; it is easily my biggest problem. For as long as I can remember (even as a little girl), every single time my nails have been painted, I pick it off. I'm such a perfectionist about my nails that I just can't keep polish on, no matter how much time I spend on it. If I'm stressed or bored and my nails are painted, they will soon be destroyed. I own a ton of polish, and as Naomi always tells me, it's going to waste because of this habit. So... I almost hate to write it, because it might be a promise broken. But. I am going to try to stop picking my nail polish off.

2) I'm going to exercise daily or at least every other day. As is the consensus, a healthy body makes for a more attractive person. Plus, I have a lot of steam to burn, and it makes me feel better.

3) I'm going to try more new things with my makeup. I love doing my eye shadow, truly. I have no problem making time for it, but sometimes I find myself getting stuck in a rut. I have difficulty finding styles I like that will flatter my weird eye shape, so I end up doing the same neutral eye frequently. When I first got into makeup, I was all for experimenting. I want to go back to that! :)

4) I want to be more well-rounded in my collections. I get really into one color of nail polish, or really into one style of clothing, and lately, I haven't been buying much new makeup at all. I have a lot of eye shadow, and that's about it. Until I can save some money to buy some other things, I need to stop adding to my nail polish collection (especially if it's a deep purple), and buying shirts/jackets/cardigans.

Does anybody else have any resolutions? I don't make personal ones, but if I did, I guess I would want to finish my last semester of high school with straight As, and enjoy the things around me more. Hope everyone has a great weekend! I'd love to do a fashion post next- it's easily the most neglected aspect of this blog.

-Rhiana

Sunday, December 18, 2011

My Beauty Life Lately: Pictures

Long time no write! Once again, I've broken a promise on here. I have so many ideas for posts (eyebrows, beauty resolutions, tutorials for all sorts of eye shadow, fashion, etc.), but laziness always wins. I have been newly inspired lately by Pinterest, a virtual "pinboard" of sorts, where users can post inspiration for a variety of things.
Some of the makeup and nails are truly gorgeous and they push me to try new things. I've recently made a big change hair wise as well- I stopped washing my hair every day, and now only shampoo every other. Though it was hard at first, my hair adjusted within a few weeks, and it saves a lot of time. Now if only my hair would start growing more quickly... I do notice changes in terms of health though, which I'm happy for. We're on Christmas break now, which will hopefully translate into some new posts- I have a lot to say, but often can't be bothered to take the accompanying pictures. I know, that's no excuse. Anyway, here are a few of the more recent things that I've managed to photograph. Enjoy! :)


Nothing super special, just sort of a new technique: using brown eyeliner as a base and mainly dark colors on the lid. Brown on brown eyes is underrated :)


My Thanksgiving makeup! I didn't go anywhere, but I still wanted to do my makeup sort of holiday-ish, hence the fall colors.


Tonight's project, galaxy nails! Excuse my horrid edges- and that's after cleaning it up. These really do look so cool, and aren't as time consuming as a lot of other detailed nails. It takes a lot of nail polish, and a sponge (I use clean makeup applicators, available for purchase at most stores), but other than that, nothing special work wise. I've got to stop picking my nail polish off- I like doing things like this, but it's usually wasted because of how quickly I pick it off.
Anyway, I really do hope to write more this week. I've let my other blog go as well; the past few months have been rough, but things are getting a lot better. Hope everyone is having a good almost Christmas :)

-Rhiana

Wednesday, December 7, 2011

Konad Tutorial

I ordered my Konad stamping kit several months ago and decided I need to finally write about it! I love it. It is really cool! It is kind of messy but easy to use and to prove it, I have a tutorial!

To use the Konad, you need a stamper, scraping tool, and design plates. I ordered a double sided stamper. The large side is great for all over design and the small end is good for small images. I also ordered six image plates to start out with: M65, M61, M57, M60, M63, and M71.


Onto the tutorial :)This manicure looks really similar to Sally Hansen Nail Effects in Misbehaved, which is what originally inspired me.


1. Clean and prep nails as usual. Apply a base coat if desired, and let it dry. Apply 2-3 coats of a base color. This is the color that will show through the Konad print. This is two coats of one of my favorites, Orly Rage.


2. Make sure all Konad tools are cleaned with non acetone nail polish remover and cotton swabs. Place the stamping plate on a paper towel, because it gets really messy. Use a thick nail polish and paint it over the design that you want to use. The company will try to tell you that this only works with their "special polish" but this is not true. Any nail polish will work of it is medium to thick consistency. For this manicure I used Sinful Colors Black on Black and Konad plate M57.


3. Use the scraping tool and slide it across the image that you want to stamp to scrape away the excess nail polish.


4. Use the stamping tool and roll it across the image to pick it up. This step must be done quickly or the polish will dry and the stamper will not pick it up.


5. After aiming the stamper, roll it across the nail to transfer the image.


6. Clean up around the edges with polish remover and a cotton swab, apply a top coat, and thats it! Messy but so cool! And so easy to do :)


I really do love it. I have had the opportunity to do this on several other girl's nails and it is a lot of fun. I want more image plates from both Konad and Bundle Monster. Christmas!

Hope this is helpful!

Naomi

Friday, October 7, 2011

Tutorial: Let's Wing It

Though today's didn't turn out the best that it ever has, winged eyeliner has become one of my newer, more favorite ways to wear my makeup. Though it looks simple, it took me a while to get the hang of, because the shape can be surprisingly difficult to master. I attempted a tutorial for it, in the hopes that maybe the few tips I've learned can help someone else. Enjoy :)


You'll want to start off with some gel or liquid eyeliner (mine is Maybelline Eye Studio Gel Liner in Blackest Black), and a brush to apply the liner; I also suggest a black eyeshadow (not pictured here) and a thin brush to apply that with.


Here's a close up of the brush I used to line my eyes- Mac 210. It's a very small brush that allows for a lot of control. An angled brush would also work well.


To begin, I dipped a brush in some black eyeshadow (Carbon from Mac) using a Loew-Cornell #8 brush (meant for painting, great for makeup, and pretty cheap)...


...In order to sketch myself a basic line that would determine the shape and length of my wing. This is one of the most important steps for me. I make a stright line up from the edge of my lower lashline, like in the next picture. Here I had already put a nude base over my eye (Eden Primer Potion from Urban Decay), and applied mascara to my upper lashes. I do that anyway before applying any of my makeup, but I actually think it makes it easier with winged eyeliner- the lashes are much harder and easier to line over, if that makes sense.


Doing the black line then makes it much simpler to fill in the rest of the liner.


I then just connect the liner to my lashline by going straight down from the top of the black line. Make sure to fill in the gaps well; I've missed the spot right in my outer lashline a few times, and it's frustrating. Mine looks a little bumpy, I guess I was just having an off day? I also go over my eyeliner with the same black
eyeshadow used before. I like to do mine fairly thick, and have the wing extend sort of far, but that's just what I think looks best with my eye shape. Obviously, adjust accordingly with width and length for your personal preference.


I couldn't get a good picture of my eyes open for the life of me, so I cropped a candid one taken later that night.

This look is easy once you get the hang of it, and quick. It's dramatic without being over the top, and it lasts all day.
Hope everyone is having a great weekend,

Rhiana

Saturday, October 1, 2011

Vintage Flower Nails and My First Half Moon Manicure

I haven't blogged in a really long time. It feels good to do it again, actually. I hope I can fix this bad habit of never updating. I have pictures of two manicures I decided to try in these last few weeks that I wanted to share. First I tried vintage roses with nail brushes. Here's how it turned out!

I used China Glaze For Audrey as the base color and Orly Two Hour Lunch, Essie Lady Like, and OPI Don't Mess With OPI for the roses, and Seche Vite as my topcoat. I would have taken pictures for a tutorial but forgot. I really loved it! Definitely one I will do again.

Next is my first attempt at a half moon manicure and a tutorial to go with it. To start, clean and prep nails as usual, and apply a protective base coat and two coats of a base color. This is the color that will show through in the end. My base coat is from Nail Magic and my base color is Essie Lady Like.


You want to let your base color dry completely before moving onto the next step. This is very important! I gave mine an hour just to be safe. You will need these reinforcement stickers for the next step.


Cut the stickers in half so they lay on the nails better. Place a sticker at the base of each nail. The most important part here is that you keep the amount of nail covered by the sticker consistent. You want each half moon at the base of the nail to be the same size. Press down the edges really well.


Take a darker polish and paint over the stickers, covering the part of the nail that is showing. I used Essie Power Clutch. Let the second color dry completely, then pull the stickers off slowly and gently, pulling away from the base of the nail.


Apply a topcoat and you are finished!


I actually really loved the way this turned out. But it is not something I will do often because of the amount of time it takes. This simple looking manicure took me an hour and a half, and it ended up chipping two days later. It is unique and really pretty but a lot of work so I will probably not be doing it very much.

That is all for now. Hope everyone is having a great weekend.

Naomi

On a side note, I just ordered a Konad nail art kit with five or six plates and I cannot wait to get it! :) I'll post about it soon!

Friday, September 9, 2011

Birthday Beauty & Aztec Nails

I'd like to start with an apology... :(. I guess my excuse is that school started and I was in a bit of a beauty stand-still. I will try to do a tutorial soon, but in the meantime, my birthday was on Monday (Labor Day!), and as usual, most of what I got had to do with makeup or beauty. The only nail polish missing is Lady Like by Essie; I let a friend borrow it. Onto pictures, enjoy, and this blog will not go six weeks without an update again. I hope.


The beautiful makeup! Carbon eyeshadow from Mac (I've only used it as an eyeliner. It's just a matte black, but a staple for eyeshadow.) Blind Date lipstick from Sula Beauty- a pretty pink that's all natural! Rouge Cream Blush in Natural from NYX (again, a pretty pink. Love NYX and all of their products that I have tried, minus the jumbo eyeshadow pencils.) NYX trio in Golden/Rust/Walnut Bronze (right up my alley, I love golds and the like.) UD Eyeshadow primer in Eden- this covers the lid beautifully, like a concealer only better, and a little goes such a long way. Thanks to Angelique for most of these gifts, minus Carbon and the Clinique High Impact mascara, which is better for more of a natural look. I use it as more of a building mascara.


Some poor swatches, I should have taken these in natural light, but when the rare blogging mood strikes nowadays, I take what I can get. From left to right: the three eyeshadow shades from the NYX trio, though really, only the cranberry and light purple-y/hard to pinpoint shade can be seen. The missing one is a golden yellow. All are shimmery and very pigmented. Then we have Carbon, which is not true to color- I had to edit this photo to bring out the other colors, and Carbon sort of got lost. It's just a black. The blush and lipstick are next, followed by UD Eden. All so pretty! :).


Nail polish! Like I said before, Lady Like is missing; it's a beige mauve sort of color, the same kind I'm always attracted to. Essie's fall collection is out (the grey and plum color featured are both from there), and it's definitely unique. Lots of muted, very opaque colors. From left to right, Power Clutch (Essie grey green. Very different, I own nothing like this), Are We There Yet? (OPI, an orange with very light shimmers running through. Gorgeous), Carry On (Essie, a little disappointed with this. I hoped it would look better on me. Very rich plum shade, almost black in certain lights), Turquoise and Caicos (Essie, I love this! So much prettier than For Audrey on me, even if it does take three coats), and last, Disco Lights (Milani. Just a standard glitter). I hadn't gotten any new nail polish for a while, and I'm so glad to be getting back into it. Now I just need to break my worst habit- picking my nail polish off right after I do it...


And here, my attempt at Aztec-inspired nails. Sorry that it looks a bit sloppy, I had just done it and wanted to take pictures before it got ruined. To do this, I painted three coats of Turquoise and Caicos, then, using a nail brush (if you go way back to one of the first posts, there's a picture of it), I painted orange stripes using Lunch at the Delhi from OPI, and small purple dashes with Essie's Carry On. I loved this combination of colors!
Again, sorry for the neglect of the blog! If we still have any readers, try to stick with us for a bit longer :/.
Hope everyone has a great weekend!

-Rhiana